A Cooking Machine – App Development
This post is the ninth in a series detailing the processes behind the research, design, material selection, online audience building, fundraising, application development, assembly, and programming of a cooking machine. See the column Stories of Food & Tech here.
In this post, I discuss the process of starting to use Swift to develop an easy-to-use application for the cooking machine- momentarily titled “TechChef.” The journey was very challenging, as I had never used Swift before. Luckily, swift has many tutorials (see here) and built-in libraries (see here) to help first-time developers like me.
Learning Swift:
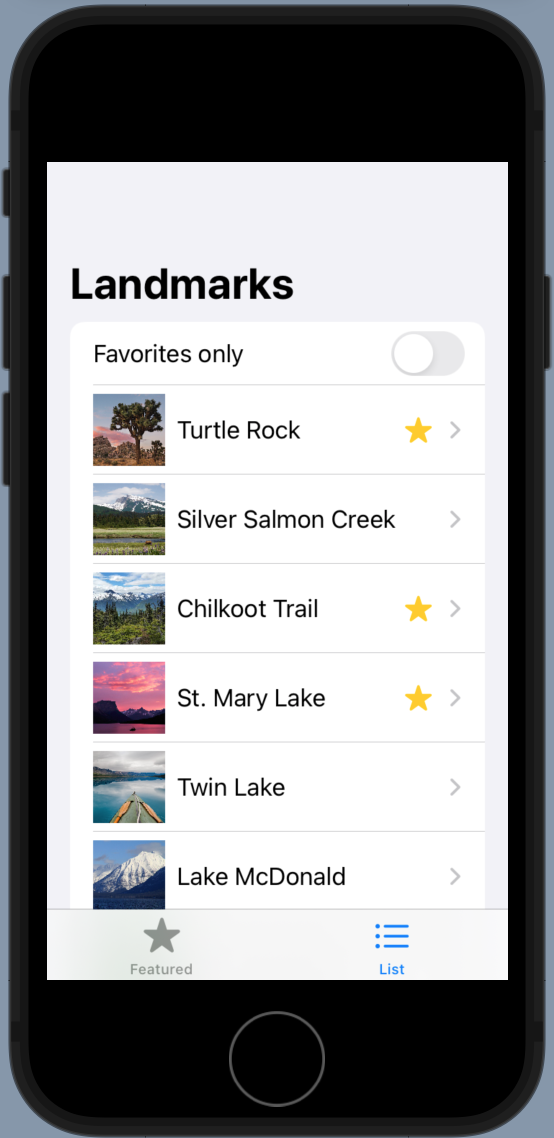
The process started by building a sample application to learn various essential skills, including items such as 1) creating different app views, 2) building lists for user navigation, 3) customizing settings through user inputs, 4) creating application logos, 5) adding animations, graphs and transitions, 6) adding category-based interfaces, and 7) adding user profile pages. Through this tutorial, I created a “Landmarks” sample application that recommends a list of landmarks for users to visit and keeps track of user-profiles and various landmarks data. Although these basic Swift UI skills don’t allow developers to exercise their creativity when building an application, they are extremely useful in making any entry-level iPhone application - precisely what I’m looking for. In the future, I will optimize the “TechChef” iPhone application so that it’s more suitable for a food-based platform.
Image 1. Landmarks List (customizable) and Categories
The left panel displays “featured” landmark icons at the top of an application page, followed by lists that are sorted out by landmarks’ categories (lakes, mountains, or rivers). The right panel simply lists all landmarks and the user’s favorite landmarks for ease of access, and each landmark is linked to a landmark’s detail page.
Image 2. Landmark Details and User Profile(customizable)
The left panel shows the detail display view, which includes landmark name, location, and description, as well as a “favorites” control button that users can toggle to keep track of their favorite places. The right panel shows a customizable user profile page, their past hiking journey, and data graphs that show the latest hike the user has completed.
The suggested time for developing this application was 4.5 hours; however, it took me three to five times longer because I was trying to learn and understand the syntax better so that I could develop my own cooking machine application later. Nevertheless, I believe this learning process paid off.
Developing my Cooking Machine Application: TechChef
Developing my own cooking machine’s iPhone application became much more intuitive after I learned these existing techniques. Although I haven’t fully finished the full application development, below is my latest progress.
First, I finished the Home list for my application so that the user can choose to do one of the four steps: 1) register for the machine, 2) select a recipe to cook, 3) cook directly without a recipe and monitor the cooking process, and 4) check out the maintenance page of the machine.
Image 3. TechChef Application Home View, Register View, and Registration Edit View
The images above show how users can click to register their machine ID. Once the registration process is done, the edited machine ID will instantaneously get updated in the application to access their latest machine details.
Image 4. TechChef Application Recipe List View and Recipe Details View
This page shows the initial list of recipes in the application system database. Upon selecting a recipe, the user may access the corresponding recipe details, such as the ingredients list and cooking instructions. I will also design a button for each recipe on the list to select the recipe for cooking instantaneously.
Click here to see the latest software development YouTube video.
Ending Thoughts:
Without previous experience, developing an application remains a slow process. Visually creative ideas are harder to implement than expected. As a result, I couldn’t fully finish the application design process as fast as expected. However, I will continue developing and optimizing this iPhone application for the next few months and keep you updated! I’ll also start ordering hardware parts for my cooking machine to assemble and test my cooking machine soon!
For the next post, I’ll discuss my latest hardware development and assembly process. Stay tuned :)


